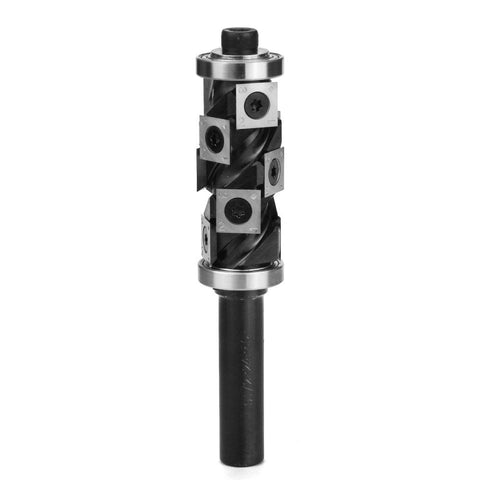
A laminate trim router bit is an invaluable tool for woodworkers, cabinet makers, and DIY enthusiasts, offering the precision needed to create clean, finished edges on laminate surfaces. Laminate materials are commonly used in countertops, cabinets, and tabletops due to their durability and versatility. However, cutting and finishing laminate requires specialized tools to achieve the smooth, seamless edges that make these materials look professional. A laminate trim router bit, with its compact size and specially designed blade, helps achieve this goal with ease and accuracy. Understanding how to use this bit properly can make all the difference in your laminate projects, ensuring crisp edges and polished finishes.
A laminate trim router bit is specifically designed to cut through thin laminate sheets and edge banding. These bits come in a variety of styles, including flush-trim, bevel, and roundover. Each type has its unique applications, making it possible to tailor the cut to the specific needs of your project. Flush-trim bits, for instance, are essential for creating perfectly level edges where the laminate and underlying material meet. Bevel bits add an angled finish that can enhance the visual appeal of a project, while roundover bits provide a smooth, rounded edge that is often used on countertops and table edges to create a soft, inviting feel.
One of the key features of a laminate trim router bit is the ball-bearing guide located at the top or bottom of the bit. This guide allows the bit to follow the edge of the workpiece accurately, keeping it aligned with the substrate as you trim. As a result, you can achieve a perfectly flush cut that matches the shape of the base material. This is particularly useful when trimming laminate over curved or irregular surfaces, as the ball-bearing guide smoothly follows the contours, eliminating any guesswork or the need for constant adjustments. The precision this guide offers ensures that your laminate edge is flawless, regardless of the shape.
For best results, it's essential to set up and use your laminate trim router bit with care. Start by securing your workpiece firmly, as even slight movements during routing can lead to uneven edges or chipped laminate. A stable work surface with strong clamps will keep your piece in place, allowing you to focus entirely on guiding the router bit smoothly along the edge. Ensure the router bit's height is set correctly, with the bearing aligned to the thickness of the laminate to achieve a consistent cut.
When routing, a slow and steady pace is key. Although it might be tempting to rush through the trim, especially on large pieces, moving too quickly can lead to tear-out or chipping along the laminate edge. By moving at a consistent pace and allowing the router bit to do the work, you'll get a clean, sharp finish without damaging the material. In cases where laminate is particularly delicate, such as with thin or brittle sheets, using a bit with carbide tips can offer added durability and sharpness, extending the lifespan of both the bit and your workpiece.
Another advantage of a laminate trim router bit is its versatility. These bits aren't limited to laminate surfaces; they can also be used effectively on wood veneer, melamine, and even soft plastics. The precision offered by the ball-bearing guide and the various bit shapes available allow you to customize the edges of numerous materials. This makes the bit an invaluable addition to your toolkit, as it can handle multiple types of projects with ease. Whether you're a professional woodworker or a DIY enthusiast, the laminate trim router bit's flexibility makes it ideal for enhancing the finishing touches on any project.
Safety is an important consideration when using a laminate trim router bit. As with any power tool, eye protection is essential to shield against chips and dust. In addition, using hearing protection can make for a more comfortable work environment, as routers can be loud, particularly when working with harder materials. Ensure your router bit is sharp and properly maintained to reduce the risk of kickback or uneven cuts. Dull bits require more force to cut, which increases the likelihood of slipping or losing control. Regularly inspecting and sharpening your bits will keep your projects safe, smooth, and professional-looking.
Maintenance and care also extend the life of your laminate trim router bit. After each use, remove any dust or debris that may have built up on the bit or the ball-bearing guide, as accumulated particles can affect the bit's performance and precision. For bits with carbide tips, a quick wipe with a damp cloth or a dedicated bit cleaner can remove resin buildup, which is particularly common when working with laminate materials. Storing your router bits in a protective case will prevent them from dulling or chipping, keeping them ready for use in future projects.
Investing in a quality laminate trim router bit is a smart choice for anyone working with laminate materials. It's a versatile, efficient, and essential tool that helps achieve professional-quality edges, enhancing both the durability and aesthetic appeal of any project. With the right techniques, a steady hand, and regular maintenance, you can make the most of this bit, creating smooth, finished edges on laminate and other materials that will stand the test of time. Whether for small DIY projects or professional-grade work, a laminate trim router bit is a valuable asset, transforming ordinary edges into the perfect finishing touch.
